Composer 私有仓库搭建
composer 私有仓库搭建方案有以下三种
-
Satis 官方推荐的工具
基本满足要求,缺点就是增加自己的package每次需要手动修改配置,版本更新需要手动,比较繁琐
-
Satisfy 在Satis基础上增加了一些便捷的功能,webhook,图形界面增加仓库等
-
coding by yourself.;
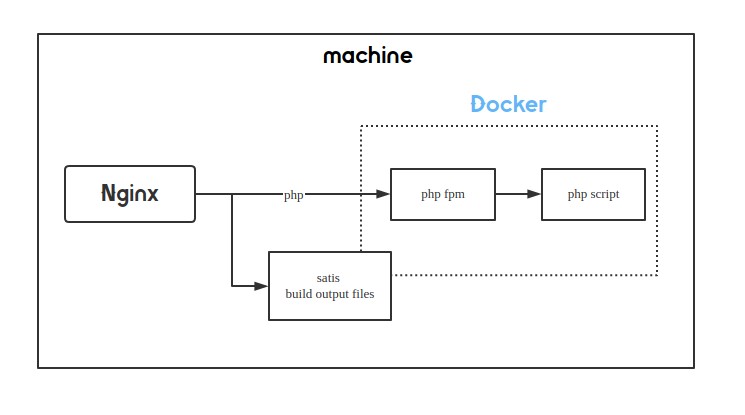
本文使用 Satisfy + docker进行搭建

一、下载
选择一个目录 /var/www/satisfy (该目录要与后面容器内的目录保持一致);
1
2
3
4
5
6
| # current commit hash master@7e2a472
git clone https://github.com/ludofleury/satisfy /var/www/satisfy
cd /var/www/satisfy
chown -R www-data:www-data .
|
二、配置docker
Dockerfile
修改docker/php/Dockerfile
(因为本文nginx 是宿主机提供的,不是独立一个nginx 容器,配置上与官方有些差异)
1
2
3
4
5
6
7
8
9
10
11
12
13
14
15
16
17
18
19
20
21
22
23
24
25
26
27
28
29
30
31
32
33
34
35
| FROM php:8.0-fpm
RUN sed -i s/deb.debian.org/mirrors.tuna.tsinghua.edu.cn/g /etc/apt/sources.list
RUN apt update && \
apt install -qy wget curl git zip unzip && \
apt clean && rm -rf /var/lib/apt/lists/* /tmp/* /var/tmp/*
ARG UNAME=www-data
ARG UGROUP=www-data
ARG UID=1000
ARG GID=1000
RUN usermod --uid $UID $UNAME
RUN groupmod --gid $GID $UGROUP
RUN wget -O /usr/local/bin/composer https://getcomposer.org/download/latest-stable/composer.phar && chmod +x /usr/local/bin/composer
COPY id_rsa /var/www/.ssh/id_rsa
RUN chmod 0600 /var/www/.ssh/id_rsa
COPY php.ini /usr/local/etc/php/conf.d/satisfy.ini
RUN mkdir -p /var/www/.ssh && chmod 0700 /var/www/.ssh && ssh-keyscan -H github.com >> /var/www/.ssh/known_hosts && \
mkdir -p /var/www/.composer && chown www-data:www-data /var/www/.composer
RUN chown -R www-data:www-data /var/www
RUN ssh-keyscan -p 222 -H <my.gitlab.com> >> /var/www/.ssh/known_hosts
USER www-data
|
DockerCompose
修改 docker-composer.yml
1
2
3
4
5
6
7
8
9
10
11
12
13
14
15
16
17
| version: '3'
services:
php:
build:
context: ./docker/php
container_name: satisfy_php
user: www-data
working_dir: /var/www/satisfy
volumes:
- .:/var/www/satisfy
- /var/www/.composer
environment:
APP_ENV: ${APP_ENV:-dev}
APP_DEBUG: ${APP_DEBUG:-1}
APP_PATH: /var/www/satisfy
ports:
- 9000:9000
|
Build
- 在 docker/php/ 目录下增加 gitlab 的 ssh id_rsa
- docker-composer build
1
2
3
4
5
6
7
8
9
| $ docker-composer build
...
---> 8346930c5d07
Removing intermediate container e1af8c887943
Step 17/17 : USER www-data
---> Running in d77d9a8ca62b
---> 8bba196f3d47
Removing intermediate container d77d9a8ca62b
Successfully built 8bba196f3d47
|
三、配置satisfy
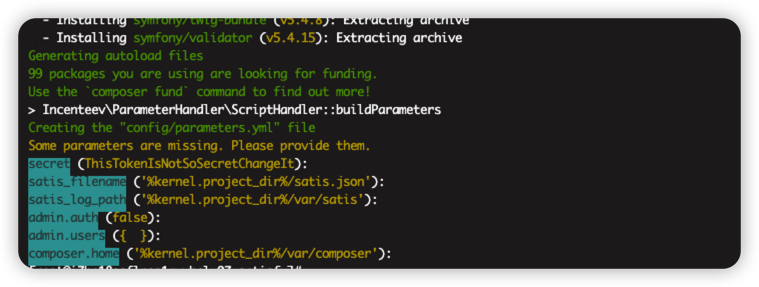
vendor依赖下载
直接使用该镜像中的composer 进行依赖下载
1
| docker run --rm -it -v $PWD:/var/www/app satisfy_php composer install -d /var/www/app
|
提示输入配置选项可以直接回车跳过,后续手动修改
satis 初始化
增加配置文件 satis.json
1
2
3
4
5
6
7
8
9
10
11
12
13
14
15
16
17
18
19
20
| {
"name": "attson/repository",
"homepage": "http://composer.attson.com/",
"repositories": [
{
"type": "vcs",
"url": "ssh://git@<gitlab.com/group/project>.git"
}
],
"require-all": true,
"config": {
"secure-http": false
},
"archive": {
"directory": "dist",
"format": "zip",
"skip-dev": false,
"prefix-url": "http://composer.attson.com/"
}
}
|
build satis
1
2
3
4
5
6
7
| docker run --rm -it -v $PWD:/var/www/app satisfy_php php /var/www/app/bin/satis build /var/www/app/satis.json /var/www/app/public -vvv
...
Writing packages.json
Pruning include directories
Writing web view
|
satisfy配置
修改 config/parameters.yml
1
2
3
4
5
6
7
8
9
10
11
12
| parameters:
secret: <any strings>
satis_filename: '%kernel.project_dir%/satis.json'
satis_log_path: '%kernel.project_dir%/var/satis'
gitlab.secret: <webhook.token>
admin.auth: true
admin.users:
admin:
password: <plaintext>
roles:
- ROLE_ADMIN
composer.home: '%kernel.project_dir%/var/composer'
|
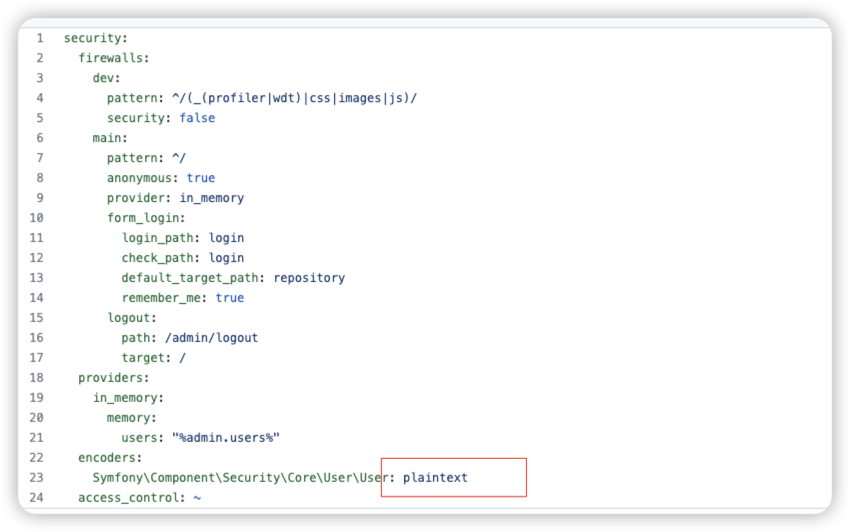
https://github.com/ludofleury/satisfy/blob/master/config/security.yml
默认密码使用的是明文方式
启动服务
nginx 配置
1
2
3
4
5
6
7
8
9
10
11
12
13
14
15
16
17
18
19
20
21
22
23
24
25
| server {
listen 80;
server_name composer.attson.com;
access_log /var/log/nginx/composer/access.log;
error_log /var/log/nginx/composer/error_log;
root /var/www/satisfy/public;
index index.html index.php;
location / {
try_files $uri $uri/ /index.php?$query_string;
}
location ~ ^(.+\.php)(.*) {
try_files $uri /index.php =404;
fastcgi_split_path_info ^(.+\.php)(.*)$;
fastcgi_pass 127.0.0.1:9000;
fastcgi_param PATH_INFO $fastcgi_path_info;
fastcgi_param SCRIPT_FILENAME $document_root$fastcgi_script_name;
include fastcgi_params;
}
}
|
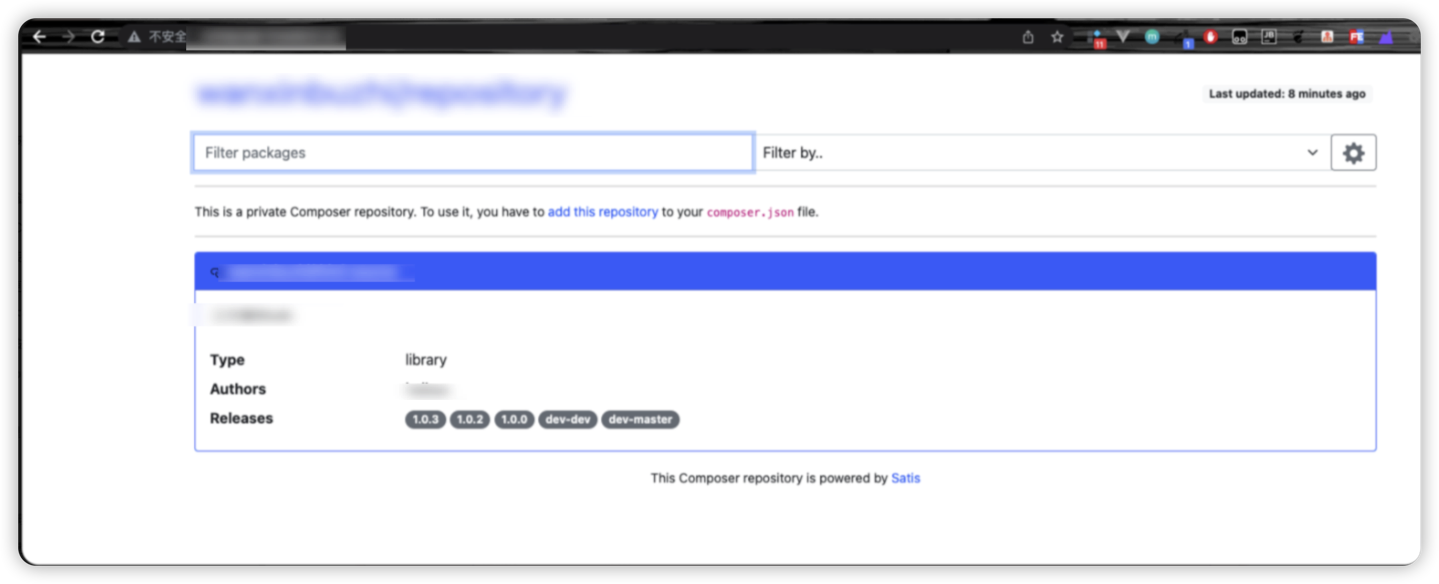
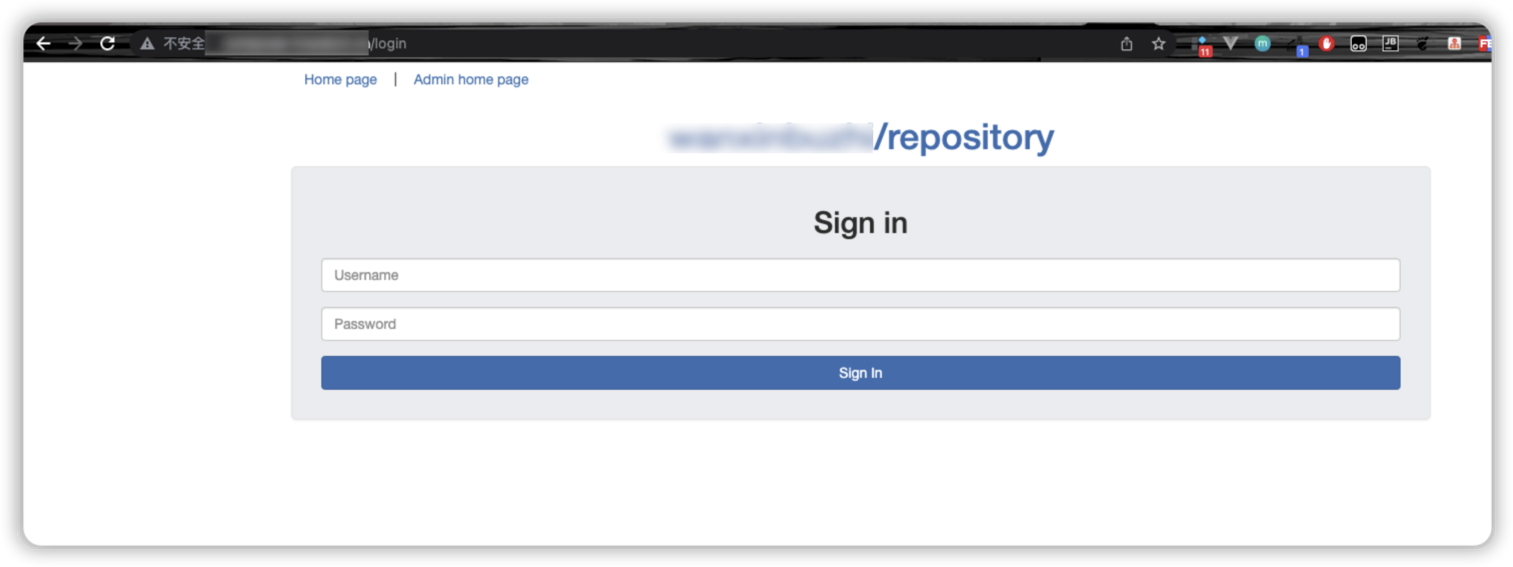
四、验证
访问地址
访问 admin/configuration
用户名密码 在 parameters.yml 配置文件
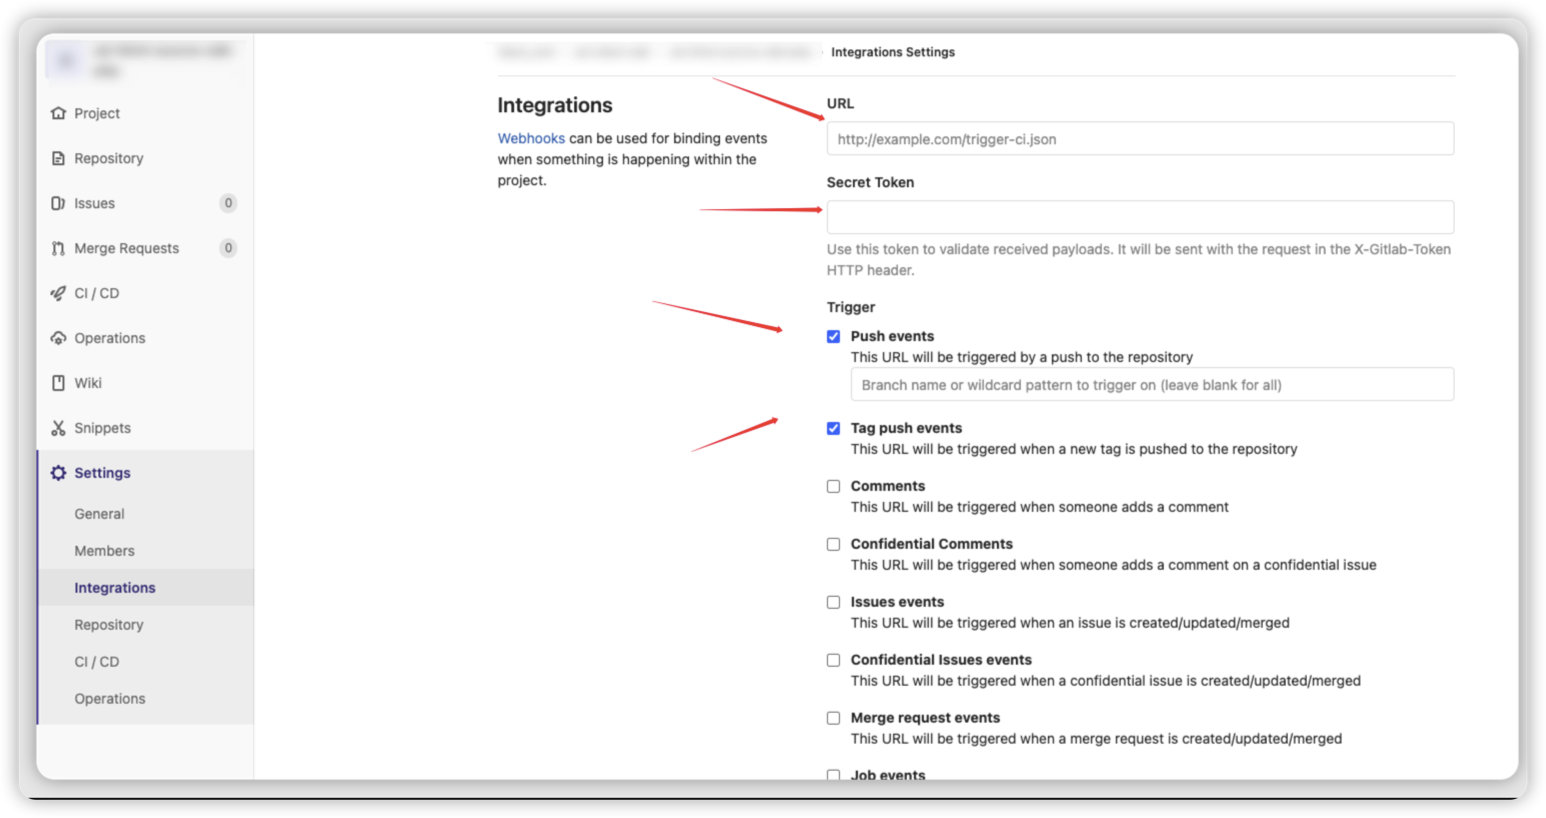
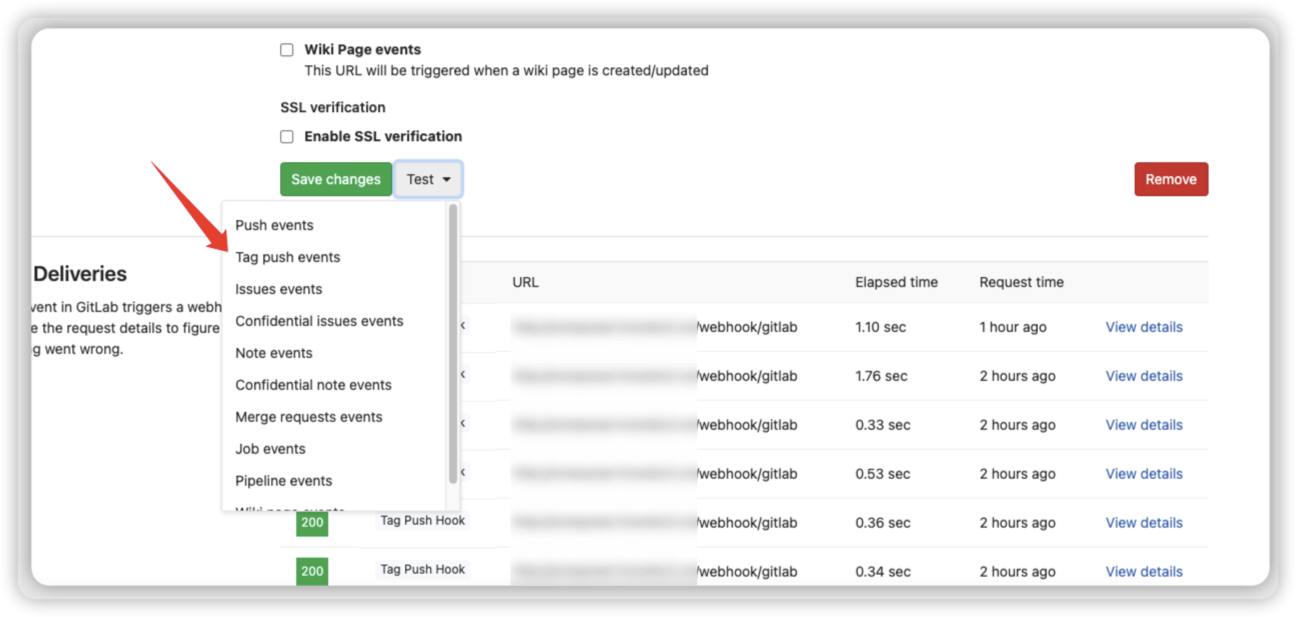
gitlab webhook;
webhook 配置完后可以test
不出意外的话,就全部搭好了
五、重新拉取
可以通过删除所有文件,清理无效的版本。(如果仓库太多的话,还是不要这么操作,全部拉取比较耗时)
1
2
3
4
5
6
| rm -rf public/dist
docker run --rm -it -v $PWD:/var/www/app satisfy_php php /var/www/app/bin/satis build /var/www/app/satis.json /var/www/app/public -vvv
chown -R www-data:www-data public
|